-02.jpg)
DIY Kid's Art Frame - Kid's Room Decor
- prettylittleartspace
- Jul 4, 2020
- 1 min read
Every child is an artist and everybody loves their kid’s art! However much you want to it is really difficult to keep safe, frame and display all of your kid’s art/painting. We have thus got an easy solution for you! Today we have got the idea of a Kid’s Art Frame that can be used to store as well as display your kid’s various arts. Also, it is an upcycled product from an old cardboard box. Hence, a win-win!

Follow our step-by-step picture tutorial to make this super special frame for your kids.
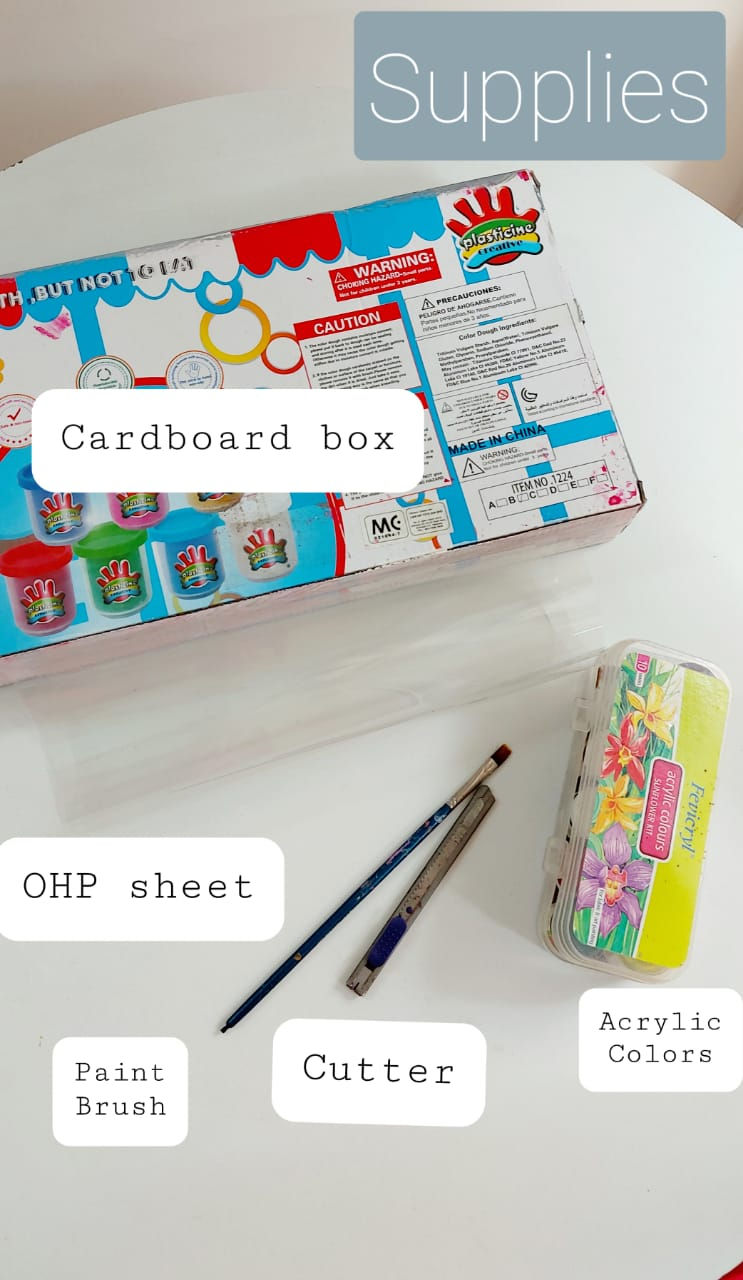
Supplies Needed:
Step 1: Cut a frame in front of the old cardboard box and paint it with grey colour.
Step 2: Cut a 1-inch slit from the top of the box to insert the artworks.
Step 3: Stick the OHP sheet in the corners of the frame from inside.
Step 4: Paint dots with white, pink and teal acrylic colours of variant sizes all over the box.
Step 5: Insert and stick a partition inside the box as shown in the image to create two A4 size artwork sections.
Step 6: Write the caption using different colours to give the child some motivation.
The DIY Kid’s Art Frame is now ready!


Comments